📖 목차
개요
안녕하세요, 생소하시겠지만 올리브영 내 디플롯 서비스 개발팀에서 프론트엔드 개발을 담당하고 있는 노땅 문지훈🦊 입니다
디플롯 서비스 개발팀 프론트엔드 개발자로서 디자인 담당자와 함께 고객에게 더 나은 서비스를 위해 유기적인 협업을 진행하면서 해결책 또는 방향성을 찾기 위해 노력하고 있습니다.
현재 상황
아티클 설명에 앞서 디플롯 서비스의 현 상황을 말씀드리자면 기존 디플롯은 Vue v2.x 프레임워크를 통해 개발된 Single Page Application(SPA) 입니다.
현재 여러 니즈에 따라서 홈 화면과 상품 상세 화면을 NextJs로 SSR 환경으로 신규 마이그레이션 하였습니다. 당연히 내년 마이그레이션 로드맵도 그려나가고 있는 상황입니다.
이번 아티클을 통해 디플롯의 신규 아키텍쳐로 마이그레이션 하면서 초기 진행했던 디자인 시스템 중 디자인 토큰을 자동화하고자 하는 니즈가 있었고 그에 따라 진행한 자동화 프로세스에 대해 디플롯 서비스는 어떻게 풀어나갔는지 소개해 드릴려고 합니다.
해당 프로세스 도입 이유
- 매번 디자인이 변경될 때마다 해당 영역을 전부 찾아서 변경된 스타일을 일일이 적용해주는 경험을 다들 해봤을 터인데 이 때 발생하는
사이드이펙트가 경험상 항상 발생했습니다. - 디자인 담당자가 피그마에 해당 디자인 토큰을 업데이트 하면
변경사항이 자동으로 Github PR로 생성되어 개발자가 변경사항을 확인하는데 매우 용이하다고 생각했습니다. - 신규 아키텍쳐로 설계하는 과정에서 성능 좋고 사용성 좋은
Zero Runtime CSS-IN-JS라이브러리를 사용해보자는 니즈가 있었고 이런 프로세스에 대한 지원을 잘해주고 있어서 궁합이 좋다고 생각했습니다.
어떤 사람에게 도움이 되는지?
- 디자인이 업데이트되고 변경된 디자인에 따라 스타일을 변경해야하는데 사이드이펙트가 걱정되시는 분들
(자동화로 모든 해소가 되는 건 아니지만 해소가 되는 부분이 확실히 존재) - 디자인시스템을 도입할 생각이고 디자인 토큰화하여 디자인시스템을 구현하고 싶은 니즈가 있는 분들
- 디자인 담당자가 업데이트한 내용을 코드에 직접 반영하지 않아도 알아서 적용되었으면 하는 니즈가 있는 분들
- 디자인 토큰을 서포트하는 최신 CSS-IN-JS Library를 활용하고자 하는 니즈가 있는 분들
- Github Action을 통해 디자인 토큰 변환을 자동화하고 싶은 니즈가 있는 분들
디플롯 기술스택
위에 언급했지만 디플롯 서비스는 Classic 이라고 불리는 Vue 프레임워크로 SPA 형식으로 동작하는 부분이 있고 Modern 이라고 불리는 NextJs 기반 SSR 형식으로 동작하는 부분으로 나뉘어져 있습니다.
해당 아티클 내용과 연관된 부분은 Modern 기반이니 Classic의 내용은 생략하겠습니다.
- NextJs v14 (app route) (SSR 프레임워크)
- Typescript
- Yarn berry/Yarn workspace Monorepo
- TanStack Query (API 데이터 캐시)
- Jotai (글로벌 스토어)
- Panda CSS (Zero Runtime CSS-IN-JS)
- Storybook (컴포넌트 테스팅)
- AWS ECR/ECS/S3
- Datadog (APM)
모노레포 구조로 Panda CSS 를 활용하여 생성한 디플롯 디자인 시스템 컴포넌트를 서비스 어플리케이션(현재는 디플롯 웹서비스 뿐이지만... 더욱 방대해지리라...)에서 재사용하는 방식으로 구현되어 있습니다.
디플롯 디자인시스템

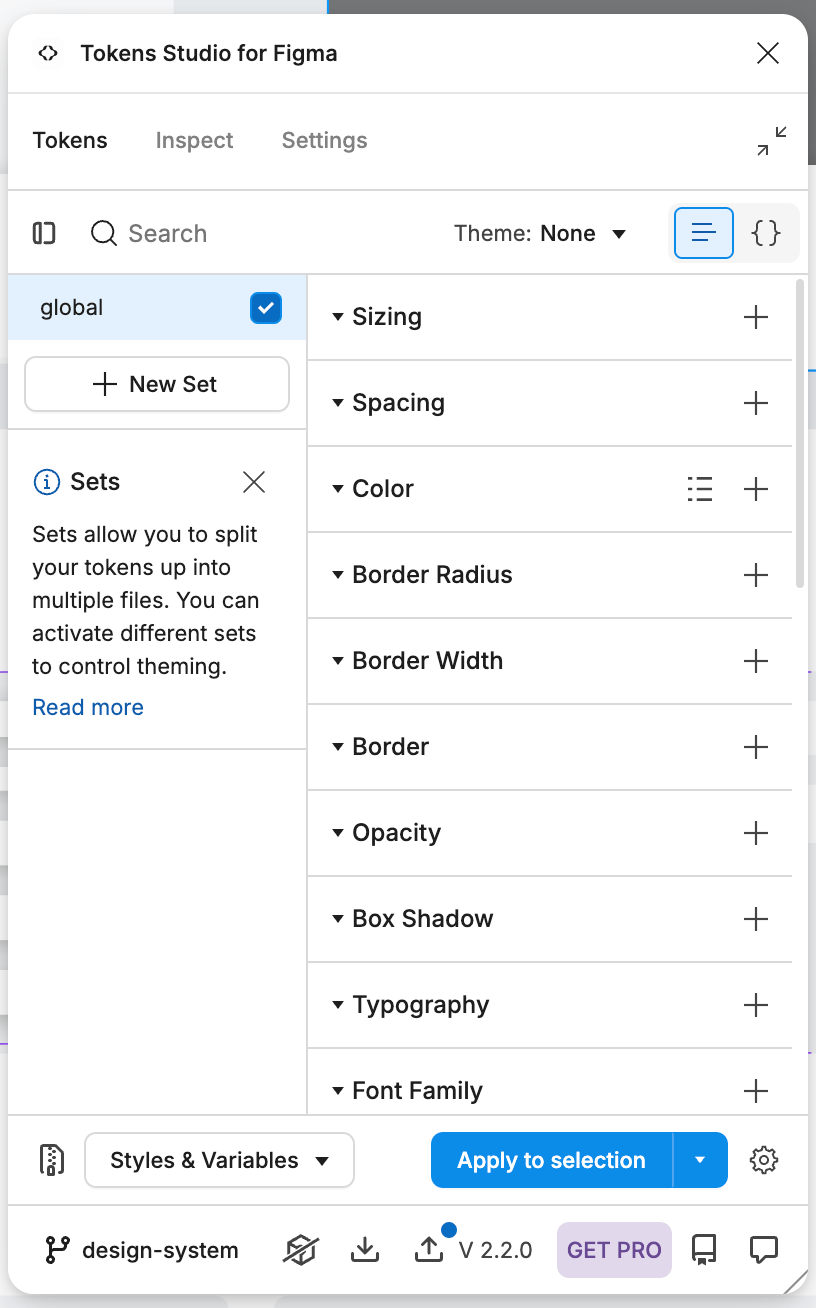
아래에서 다시 설명드리겠지만 Figma로 디자인 시스템이 정의되어 있고 Figma에서 디자인 토큰을 정의 후 Figma 플러그인 Tokens Studio For Figma를 활용하여 Export 및 Github Branch로의 Push까지 진행하고 있습니다.
현재 진행형으로 확장되고 있고 네이티브 전환을 앞두고 네이티브향 디자인 시스템도 추가되고 있습니다. (11월 중 네이티브 전환 완료!)
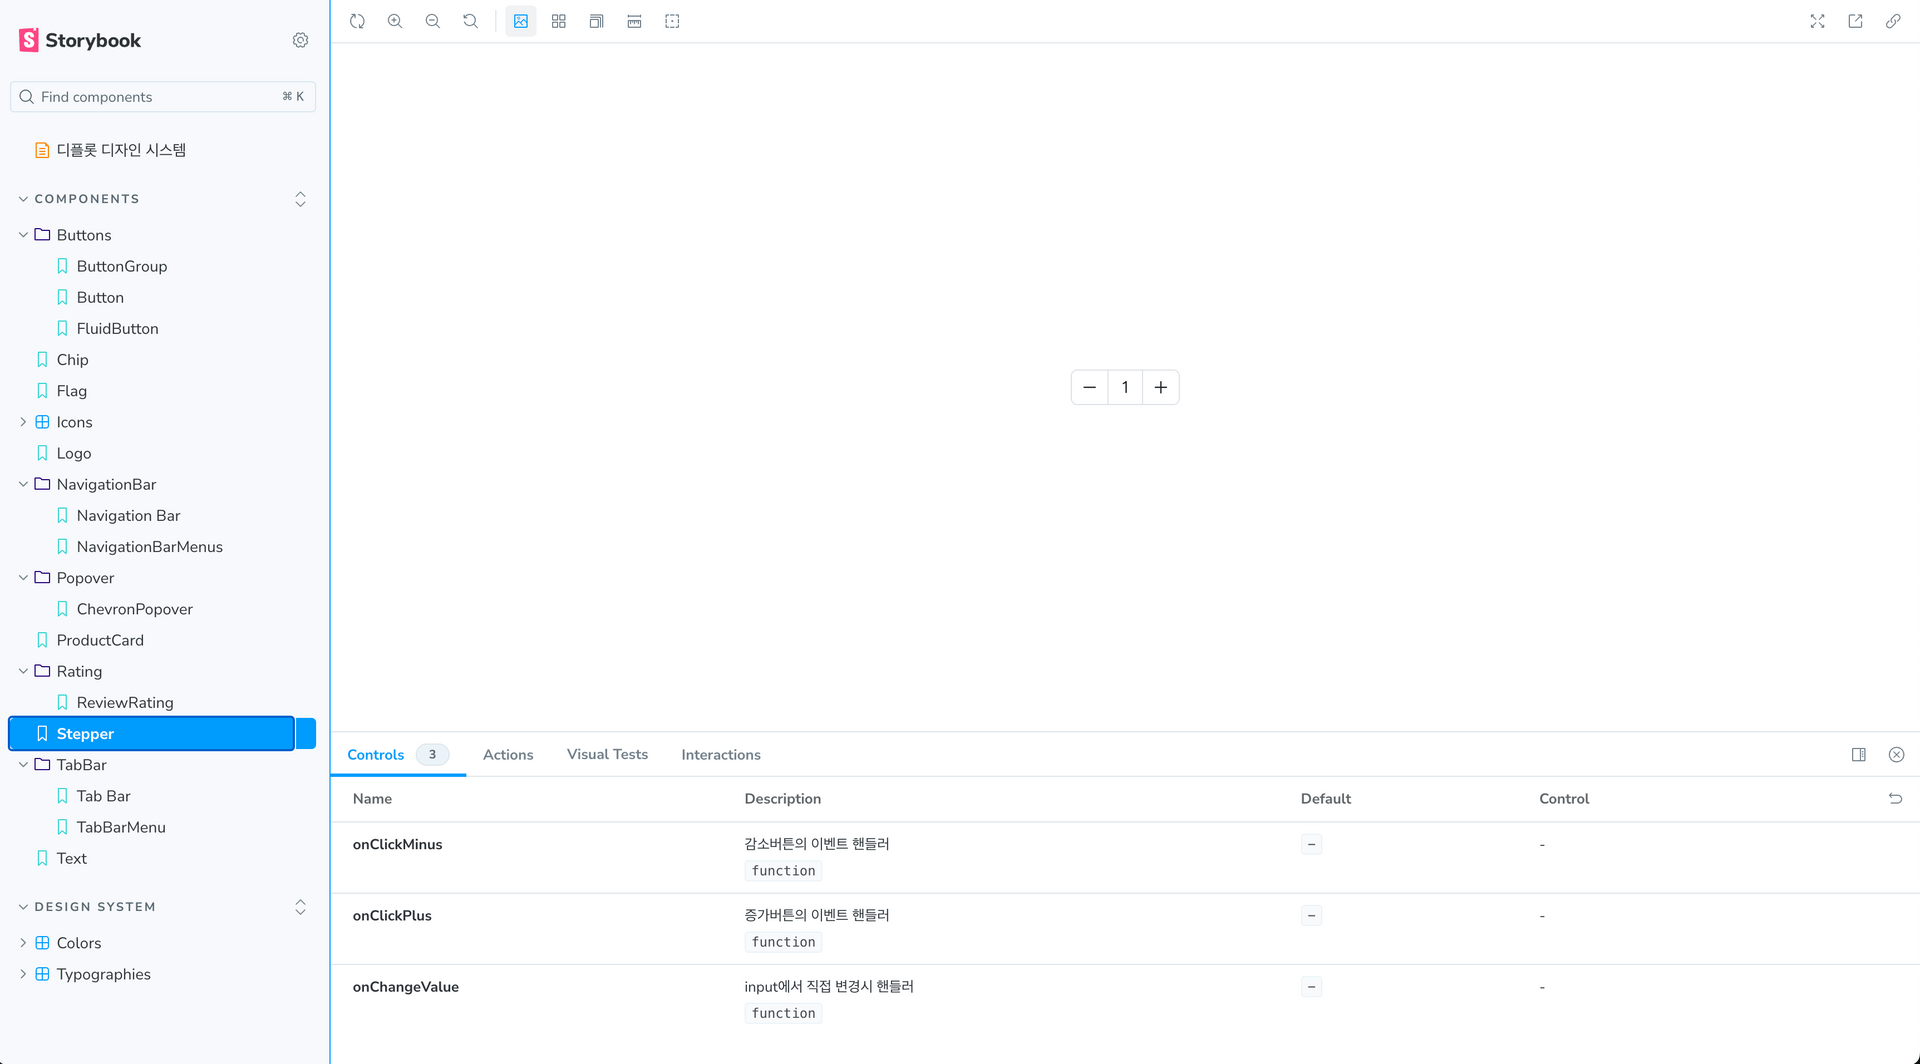
Color, Typography, Icons, Layout, Shape, Components 정도로 구분되어 있고 스토리북을 통해 개발된 컴포넌트를 확인할 수 있도록 설계되어 있습니다.
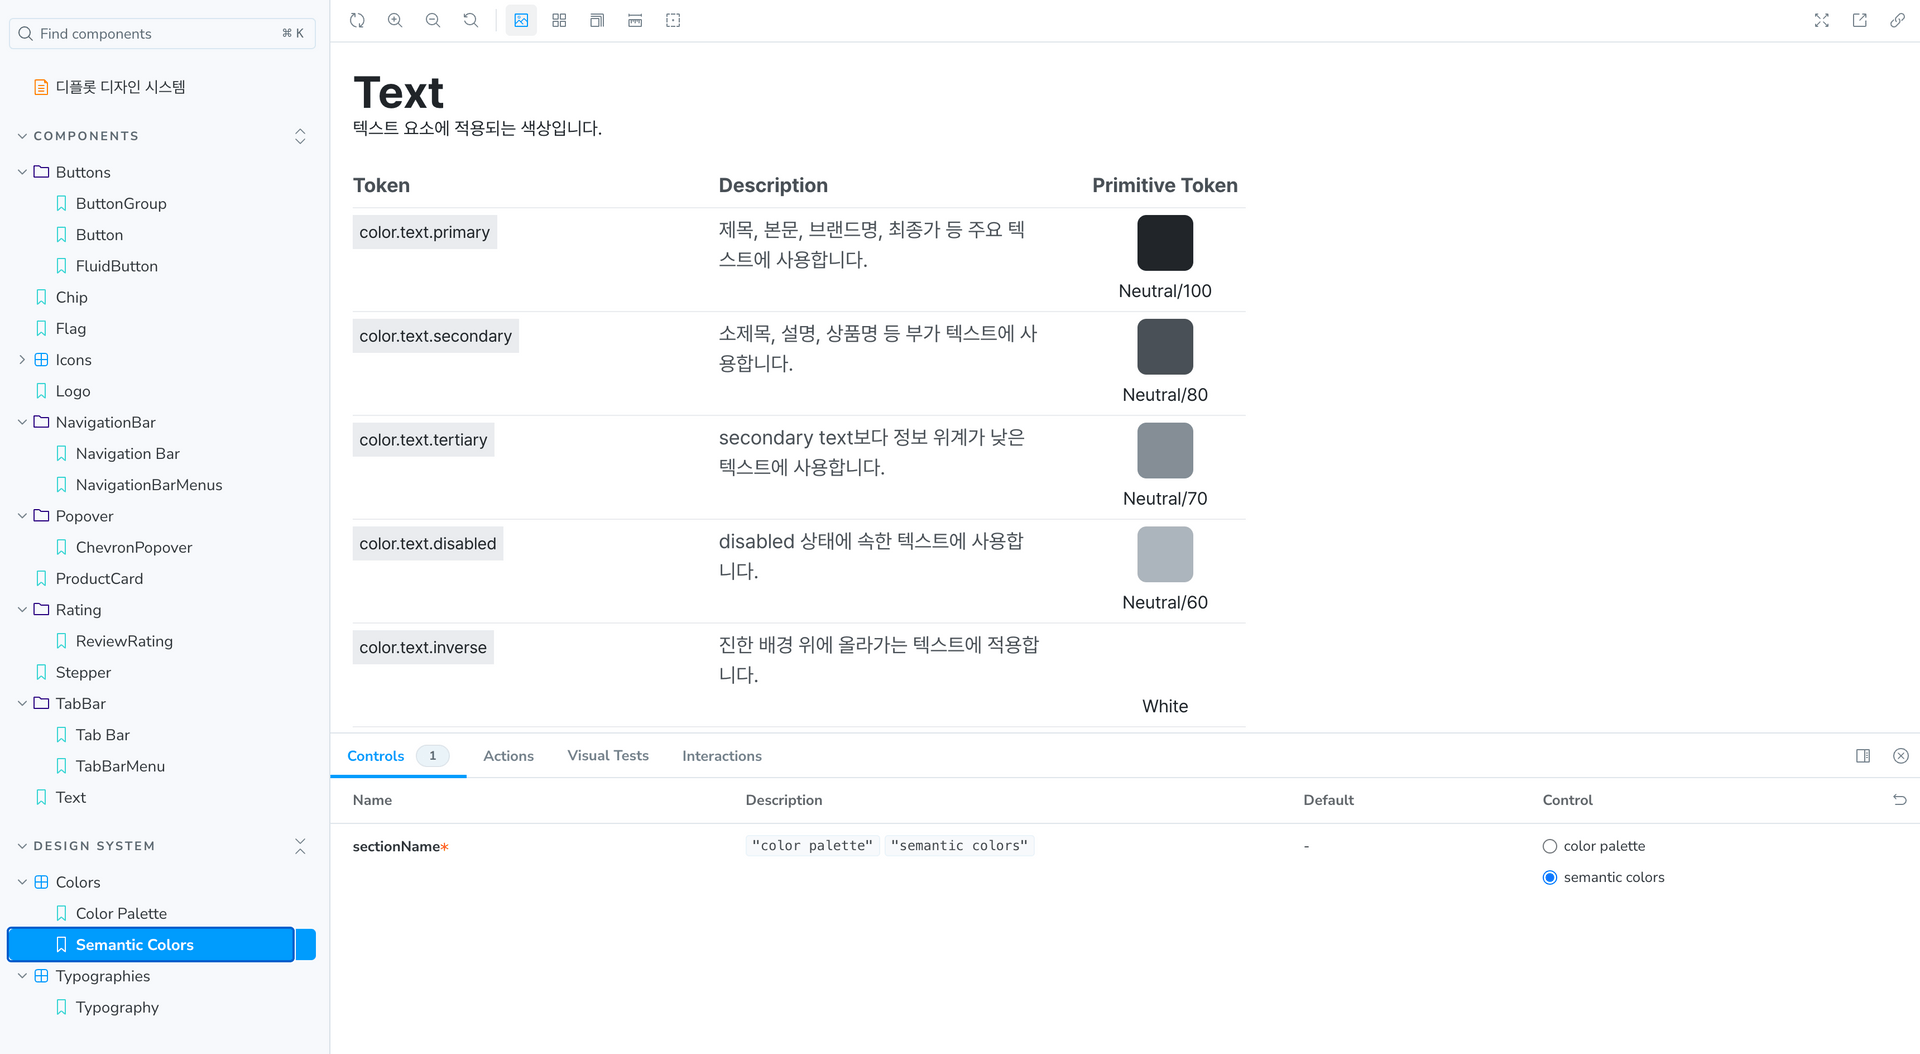
디자인 토큰
Primitive Tokens, Semantic Tokens, Component-Specific Tokens 이렇게 세 가지로 분류됩니다.
토큰을 정의하는 곳마다 사용하는 용어는 조금씩 다를 수 있지만, 기본적인 계층 구조는 동일합니다.
저희는 Semantic Tokens와 Primitive Tokens로 관리하고 있습니다.
Primitive Tokens- 디자인 내에서 색상, 폰트 종류, 간격 등과 같은 기본적인 값을 정의하는 토큰입니다. 해당 토큰은 다른 토큰의 기초가 되므로, 보통 참조용으로 사용을 합니다.
Semantic Tokens- 의미에 기반한 토큰으로, Primitive Tokens을 참조하여 ‘surface/primary’나 ‘text/default’처럼 의미에 따라 디자인 요소를 추상화한 토큰입니다.
구현하고자 하는 방향
제가 생각한 방향성은 아래와 같았습니다. 이 과정이 정답은 아니니 여러분은 더 좋은 방법으로 구현하실 수 있을 겁니다.
수동이라고 되어 있는 부분도 자동화하면 좋겠는데 제 능력 부족이라 몇 가지 과정만 자동화로 진행되었습니다.
실제 적용
디자인 시스템 업데이트
이 스텝은 디자인 담당자의 프로세스라 간략하게만 설명하겠습니다. 자세한 내용은 Tokens Studio for Figma Docs에서 확인가능 합니다.
디자인 시스템을 피그마에 적용 후 Tokens Studio For Figma 플러그인을 활용하여 Tokenization을 진행합니다.
Git Branch Push
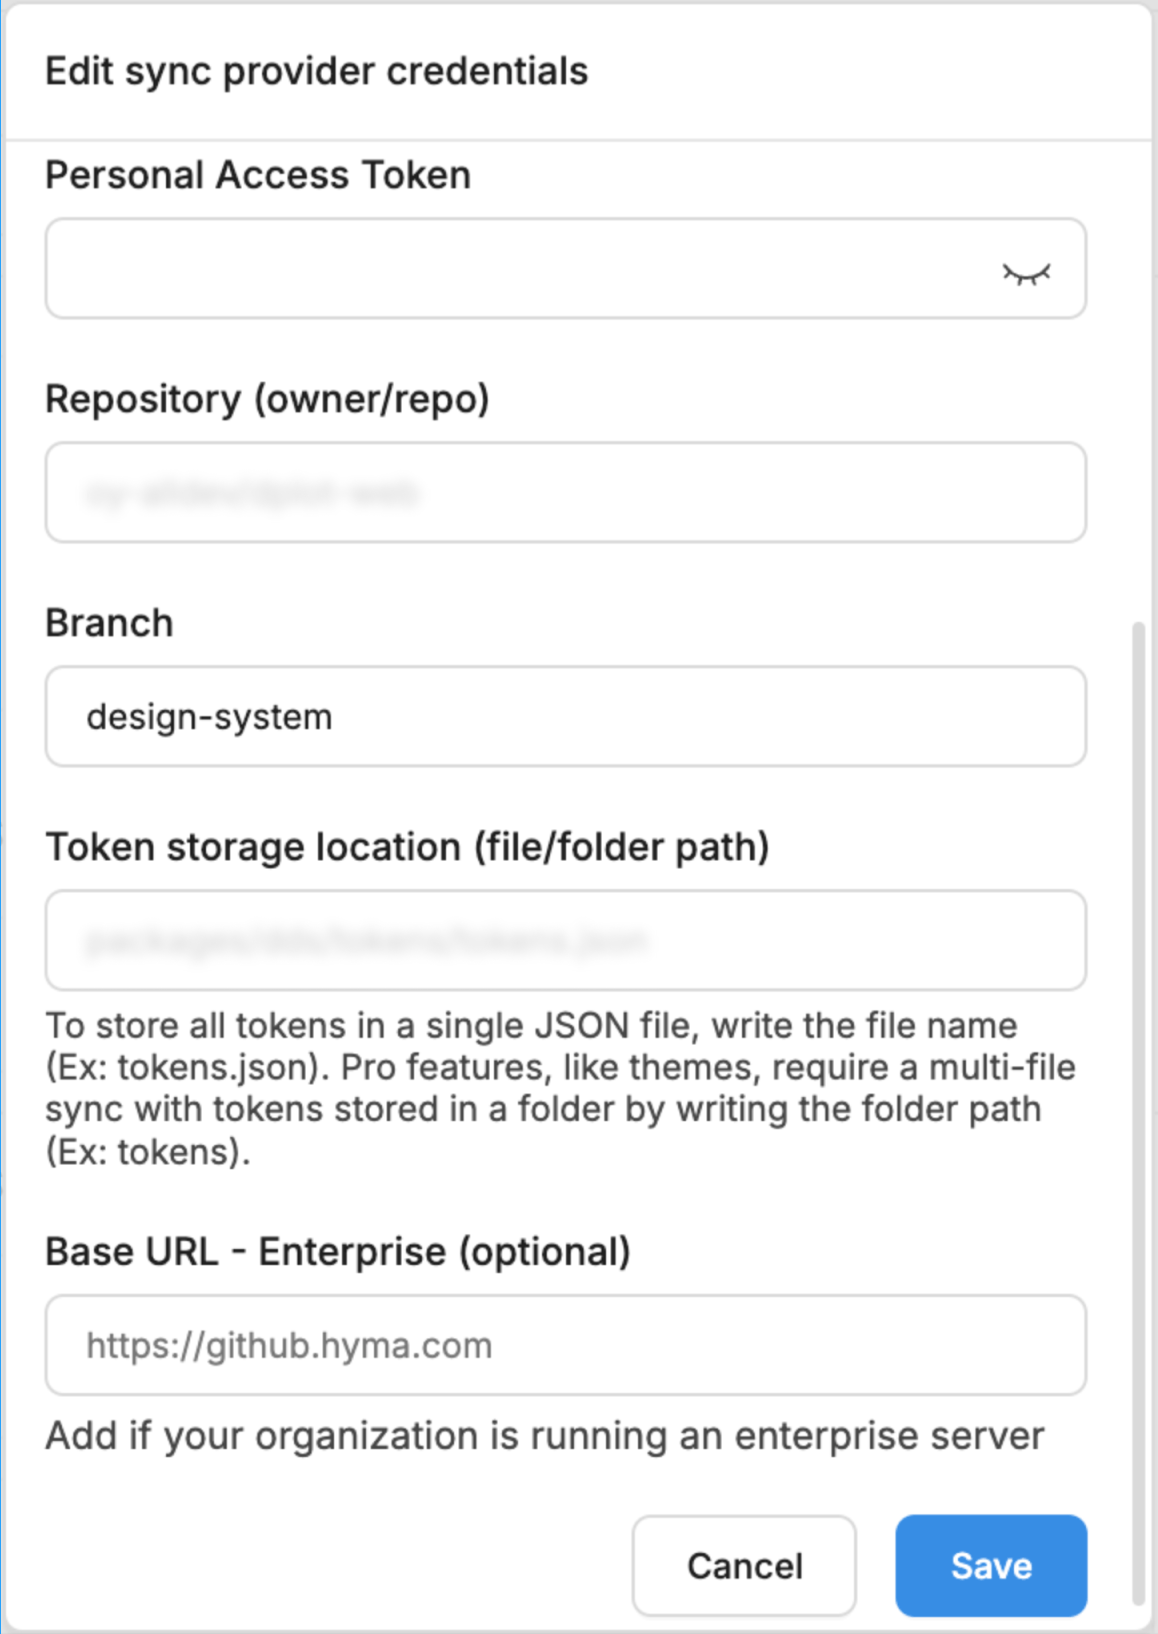
Git에 대한 Access 권한을 얻은 뒤 Repo 설정과 브랜치를 설정하고 위에서 정의한 디자인 토큰을 JSON으로 Export 할 파일 경로를 설정하면 Figma 설정은 끝이라고 볼 수 있습니다.
{
  "semantic tokens/dark": {
    "color": {
      "text": {
        "primary": {
          "value": "{color.common.white}",
          "type": "color"
        },
        "secondary": {
          "value": "{color.neutral.10}",
          "type": "color"
        },
        ...
      },
      "background": {
        "primary": {
          "value": "{color.neutral.100}",
          "type": "color"
        },
        "secondary": {
          "value": "{color.neutral.90}",
          "type": "color"
        },
        ...
      },
      ...
    },
    "radius": {
      "minimal": {
        "value": "{radius.xs}",
        "type": "dimension"
      },
      "rounded": {
        "value": "{radius.2xl}",
        "type": "dimension"
      },
      "semi-rounded": {
        "value": "{radius.sm}",
        "type": "dimension"
      }
    },
    ...
  },
  "semantic tokens/light": {
    "color": {
      "text": {
        "primary": {
          "value": "{color.neutral.100}",
          "type": "color"
        },
        "secondary": {
          "value": "{color.neutral.80}",
          "type": "color"
        },
        ...
      },
      "background": {
        "primary": {
          "value": "{color.neutral.10}",
          "type": "color"
        },
        "secondary": {
          "value": "{color.neutral.20}",
          "type": "color"
        },
        ...
      },
      ...
    },
    "radius": {
      "minimal": {
        "value": "{radius.xs}",
        "type": "dimension"
      },
      "rounded": {
        "value": "{radius.2xl}",
        "type": "dimension"
      },
      "semi-rounded": {
        "value": "{radius.sm}",
        "type": "dimension"
      }
    },
    ...
  },
}
위와 같은 디자인 토큰값으로 매핑된 JSON 파일(디자인 토큰 정보)을 특정 경로에 생성하고 Git Push를 하게 됩니다.
Github Action 설정
name: Create PR from design-system to main

# design-system 브랜치의 tokens.json 파일에 대한 push 감지
on:
  push:
    branches:
      - design-system
    paths:
      - "packages/{package-name}/{file-name}.json" // 예시

jobs:
  createPullRequest:
    runs-on: ubuntu-latest
    steps:
      - uses: actions/checkout@v4
      - uses: actions/setup-node@v4
        with:
          node-version: 18
      # 디자인 파일 변환 후 생성된 파일도 push해서 main 브랜치로 병합하는 PR을 생성
      # 아래 경로나 파일명은 예시입니다.
      - name: Run Token Transformer
        run: |
          npx token-transformer packages/{package-name}/{file-name}.json packages/{package-name}/{dark-target-name}.json "semantic tokens/dark","primitive/Value" "primitive/Value"
          npx token-transformer packages/{package-name}/{file-name}.json packages/{package-name}/{light-target-name}.json "semantic tokens/light","primitive/Value" "primitive/Value"
          npx token-transformer packages/{package-name}/{file-name}.json packages/{package-name}/{primitive-target-name}.json "primitive/Value"
          npx token-transformer packages/{package-name}/{file-name}.json packages/{package-name}/{typography-desktop-target-name}.json "typography/desktop"
          npx token-transformer packages/{package-name}/{file-name}.json packages/{package-name}/{typography-mobile-target-name}.json "typography/mobile"
          git config --global user.name "{user-name}"
          git config --global user.email "{email}"
          git add .
          git commit -m '피그마 디자인 토큰 파일 변환'
          git push
        env:
          GITHUB_TOKEN: ${{ secrets.DESIGN_SYSTEM_ACCESS_TOKEN }}
      - name: Create Pull Request
        run: gh pr create -B main -H design-system --title '💄 디자인 토큰 업데이트' --body '디자인 토큰이 업데이트 후 변환작업을 수행했습니다.'
        env:
          GITHUB_TOKEN: ${{ secrets.DESIGN_SYSTEM_ACCESS_TOKEN }}
특정 코드 라인 설명
- 명령어
npx token-transformernpx는 npm package runner로 npm 레지스트리에서 원하는 패키지를 실행(Execute)합니다.token-transformer는 https://www.npmjs.com/package/token-transformer 패키지로 tokens studio에서 오픈소스로 만든 Figma 오픈소스입니다.
- Run Token Transformer 태스크
- 업데이트된
tokens.json파일을 특정 타입의 토큰으로 분류해주는 변환 과정과 Git 커밋 후 Push와 PR 생성까지 하는 부분입니다. - 토큰 변환 명령어
npx token-transformer {input JSON} {output JSON} {sets} {excludes}- input JSON: 변환할 대상 파일
- output JSON: 추출할 대상 파일 (존재하지 않으면 생성)
- sets: 변환시 참조할 Key
- excludes: 추출 제외할 Key
- 자세한 내용은 Token Transformer 사용하기 해당 레퍼런스를 참고하시면 됩니다.
- 업데이트된
transform-dark-tokens.json- Dark Theme에 대한 Semantic Tokens의 Key Value 매핑된 JSON 입니다.
transform-light-tokens.json- Light Theme에 대한 Semantic Tokens의 Key Value 매핑된 JSON 입니다.
transform-primitive-tokens.json- 타이포그래피 관련 Tokens가 제외된 Primitive Tokens의 Key Value 매핑된 JSON 입니다.
transform-typography-desktop-tokens.json- Desktop 버전의 타이포그래피 관련 Primitive Tokens의 Key Value 매핑된 JSON 입니다.
transform-typography-mobile-tokens.json- Mobile 버전의 타이포그래피 관련 Primitive Tokens의 Key Value 매핑된 JSON 입니다.
Panda CSS의 Token으로 변환 및 정의
위 Step에서 변환된 토큰들은 아직 Panda CSS에서 사용할 수 없는 형태입니다. 결국 우리가 사용할 사용할 수 있는 토큰으로 변환하고 바인딩하는 과정이 필요했습니다.
저희는 Panda CSS를 사용하고 있기에 Panda CSS Tokens 문서를 보고 Panda CSS가 지원하는 형태로 변경하는 과정을 거치기로 판단했습니다.
디플롯 웹 소스에서 디자인시스템(모노레포 환경)이 빌드되는 과정에서 해당 프로세스를 거치게 되는데요.
- Panda CSS가 해석할 수 있는 토큰 형태로 변환 기능 구현
// Panda CSS에서 지원하는 형태의 토큰 카테고리 Key
const keys: TokenCategory[] = [
  'aspectRatios',
  'zIndex',
  'opacity',
  'colors',
  'fonts',
  'fontSizes',
  'fontWeights',
  'lineHeights',
  'letterSpacings',
  'sizes',
  'shadows',
  'spacing',
  'radii',
  'borders',
  'borderWidths',
  'durations',
  'easings',
  'animations',
  'blurs',
  'gradients',
  'breakpoints',
  'assets',
];

const defaultInfo = {
  dark: {},
  light: {},
  primitive: {},
  mobileTypo: {},
  desktopType: {},
};

// 위 각 토큰 카테고리마다 defaultInfo 형태로 구조를 만들어 준다.
const defaultMap = keys.reduce((acc, cur) => {
  acc[cur] = cloneDeep(defaultInfo);
  return acc;
}, {});

// 이전 Step 에서 변환과정을 거쳤던 각 디자인 토큰 JSON을 Panda CSS가 해석할 수 있는 Key의 형태로 변환해주는 과정을 거친다.
let tokenInfo = getTransformedPrimitiveTokens(defaultMap, primitiveTokens);
tokenInfo = getTransformedDarkTokens(tokenInfo, darkThemeTokens);
tokenInfo = getTransformedLightTokens(tokenInfo, lightThemeTokens);
tokenInfo = getTransformedTypoDesktopTokens(tokenInfo, typoDesktopTokens);
tokenInfo = getTransformedTypoMobileTokens(tokenInfo, typoMobileTokens);

// Panda CSS Token으로 사용할 완전체 형태를 만들어 준다. (계속 디자인 시스템 확장 중)
const tokens = {
  colors: {
    ...(tokenInfo.colors.primitive ?? {}),
    dark: { ...(tokenInfo.colors.dark ?? {}) },
    light: { ...(tokenInfo.colors.light ?? {}) },
  },
  spacing: { ...(tokenInfo.spacing.primitive ?? {}), ...(tokenInfo.spacing.dark ?? {}) },
  radii: { ...(tokenInfo.radii.primitive ?? {}), ...(tokenInfo.radii.dark ?? {}) },
  opacity: { ...(tokenInfo.opacity.primitive ?? {}) },
  fontSizes: {
    desktop: {
      ...(tokenInfo.fontSizes.desktop ?? {}),
    },
    mobile: {
      ...(tokenInfo.fontSizes.mobile ?? {}),
    },
  },
  fontWeights: {
    desktop: {
      ...(tokenInfo.fontWeights.desktop ?? {}),
    },
    mobile: {
      ...(tokenInfo.fontWeights.mobile ?? {}),
    },
  },
  lineHeights: {
    desktop: {
      ...(tokenInfo.lineHeights.desktop ?? {}),
    },
    mobile: {
      ...(tokenInfo.lineHeights.mobile ?? {}),
    },
  },
  fonts: {
    desktop: {
      ...(tokenInfo.fonts.desktop ?? {}),
    },
    mobile: {
      ...(tokenInfo.fonts.mobile ?? {}),
    },
  },
  shadows: {
    dark: { ...(tokenInfo.shadows.dark ?? {}) },
    light: { ...(tokenInfo.shadows.light ?? {}) },
  },
};

// 해당 토큰을 Panda CSS의 설정파일에 추가만 해주면 된다.
export { tokens };- 토큰 변환 helper 기능 구현
// 각 변환과정에서 재사용할 기능
const recursion = (obj) => {
  if (!obj || isEmpty(obj)) {
    return;
  }
  const entries = Object.entries(obj);
  let rv = {};
  entries.forEach(([key, value]) => {
    const replaceKey = key.replaceAll(' ', '-');
    if (value?.value) {
      rv[replaceKey] = { value: value.value, description: value.description };
    } else {
      rv[replaceKey] = recursion(value);
    }
  });
  return rv;
};
// Primitive 디자인 토큰을 Panda CSS 가 해석할 수 있는 토큰 Key 값으로 바인딩한다.
export const getTransformedPrimitiveTokens = (infoMap, input) => {
  if (!input) {
    return infoMap;
  }
  const clone = cloneDeep(infoMap);
  const keys = Object.keys(input);
  let rv = recursion(input);
  keys.forEach((key) => {
    let targetKey = '';
    switch (key) {
      case 'color': {
        targetKey = 'colors';
        break;
      }
      case 'alpha-color': {
        targetKey = 'colors';
        break;
      }
      case 'radius': {
        targetKey = 'radii';
        break;
      }
      case 'spacing':
      case 'opacity': {
        targetKey = key;
        break;
      }
      default: {
        break;
      }
    }
    if (targetKey) {
      clone[targetKey].primitive = { ...(clone[targetKey]?.primitive ?? {}), ...rv[key] };
    }
  });
  return clone;
};

// Desktop 버전의 타이포그래피 디자인 토큰을 Panda CSS 가 해석할 수 있는 토큰 Key 값으로 바인딩한다.
export const getTransformedTypoDesktopTokens = (infoMap, input) => {
  if (!input || !infoMap) {
    return infoMap;
  }
  const clone = cloneDeep(infoMap);
  let rv = recursion(input);
  clone.fonts.desktop = rv.font.family; // semantic
  clone.fontWeights.desktop = rv.font.weight;
  clone.fontSizes.desktop = rv.font.size;
  clone.lineHeights.desktop = rv.font['line-height'];

  return clone;
};

...  //원하는 방향의 기능들을 생각하신대로 구현하면 됩니다.
개발시 사용할 수 있도록 Panda CSS 설정 적용
Panda CSS는 설정파일이 panda.config.ts 또는 js 로 되어 있습니다.
해당 파일에 설정해주시면 됩니다. 아주 간단하죠?
import { definePreset } from '@pandacss/dev';

export const preset = definePreset({
  staticCss: {
    css: [...staticCss],
  },
  // Useful for theme customization
  theme: {
    extend: { // extend 일 경우 Panda CSS가 기본 제공해주는 토큰들도 함께 사용할 수 있다. 직접 구현한 토큰들만 사용하고자 할 경우에는 extend: {} 를 제외하고 theme: tokens 로 정의하면 된다.
      tokens, // 정의한 토큰을 바인딩.
    },
  },
  ...
자세한 내용은 Panda CSS Tokens 참고하시면 됩니다. 요즘은 이런 token support 기능이 있는 CSS-IN-JS가 많아서 구현이 편해진 것 같아요.
결과
Panda CSS 빌드 후 결과물을 확인할 수 있습니다.
export type ColorToken = "current" | "black" | "white" | "transparent" | "rose.50" | "rose.100" | "rose.200" | "rose.300" | "rose.400" | "rose.500" | "rose.600" | "rose.700" | "rose.800" | "rose.900" | "rose.950" | "pink.50" | "pink.100" | "pink.200" | "pink.300" | "pink.400" | "pink.500" | "pink.600" | "pink.700" | "pink.800" | "pink.900" | "pink.950" | "fuchsia.50" | "fuchsia.100" | "fuchsia.200" | "fuchsia.300" | "fuchsia.400" | "fuchsia.500" | "fuchsia.600" | "fuchsia.700" | "fuchsia.800" | "fuchsia.900" | "fuchsia.950" | "purple.50" | "purple.100" | "purple.200" | "purple.300" | "purple.400" | "purple.500" | "purple.600" | "purple.700" | "purple.800" | "purple.900" | "purple.950" | "violet.50" | "violet.100" | "violet.200" | "violet.300" | "violet.400" | "violet.500" | "violet.600" | "violet.700" | "violet.800" | "violet.900" | "violet.950" | "indigo.50" | "indigo.100" | "indigo.200" | "indigo.300" | "indigo.400" | "indigo.500" | "indigo.600" | "indigo.700" | "indigo.800" | "indigo.900" | "indigo.950" | "sky.50" | "sky.100" | "sky.200" | "sky.300" | "sky.400" | "sky.500" | "sky.600" | "sky.700" | ...

export type RadiusToken = "3xl" | "full" | "sm" | "md" | "lg" | "xl" | "2xl" | "xs" | "minimal" | "rounded" | "semi-rounded"

export type OpacityToken = "1" | "2" | "3" | "4" | "5" | "6"

export type FontSizeToken = "2xs" | "xs" | "sm" | "md" | "lg" | "xl" | "2xl" | "3xl" | "4xl" | "5xl" | "6xl" | "7xl" | "8xl" | "9xl" | "desktop.display-lg" | "desktop.display-md" | "desktop.display-sm" | "desktop.heading-lg" | "desktop.heading-md" | "desktop.heading-sm" | "desktop.heading-xs" | "desktop.body-lg" | "desktop.body-md" | "desktop.body-sm" | "desktop.label-sm" | "desktop.label-xs" | "desktop.label-xl" | "desktop.label-lg" | "desktop.label-md" | "desktop.body-xl" | "mobile.display-lg" | "mobile.display-md" | "mobile.display-sm" | "mobile.heading-lg" | "mobile.heading-md" | "mobile.heading-sm" | "mobile.heading-xs" | "mobile.body-lg" | "mobile.body-md" | "mobile.body-sm" | "mobile.label-sm" | "mobile.label-xs" | "mobile.label-xl" | "mobile.label-lg" | "mobile.label-md" | "mobile.body-xl"

export type FontWeightToken = "thin" | "extralight" | "light" | "normal" | "medium" | "semibold" | "bold" | "extrabold" | "black" | "desktop.regular" | "desktop.semibold" | "desktop.bold" | "desktop.bold-italic" | "desktop.regular-italic" | "desktop.semibold-italic" | "mobile.regular" | "mobile.semibold" | "mobile.bold" | "mobile.bold-italic" | "mobile.regular-italic" | "mobile.semibold-italic"

export type LineHeightToken = "none" | "tight" | "snug" | "normal" | "relaxed" | "loose" | "desktop.display-lg" | "desktop.display-md" | "desktop.display-sm" | "desktop.heading-lg" | "desktop.heading-md" | "desktop.heading-sm" | "desktop.heading-xs" | "desktop.body-lg" | "desktop.body-md" | "desktop.body-sm" | "desktop.label-sm" | "desktop.label-xs" | "desktop.body-xl" | "desktop.label-md" | "desktop.label-lg" | "desktop.label-xl" | "mobile.display-lg" | "mobile.display-md" | "mobile.display-sm" | "mobile.heading-lg" | "mobile.heading-md" | "mobile.heading-sm" | "mobile.heading-xs" | "mobile.body-lg" | "mobile.body-md" | "mobile.body-sm" | "mobile.label-sm" | "mobile.label-xs" | "mobile.body-xl" | "mobile.label-md" | "mobile.label-lg" | "mobile.label-xl"
...

export type Tokens = {
  aspectRatios: AspectRatioToken
  borders: BorderToken
  easings: EasingToken
  durations: DurationToken
  letterSpacings: LetterSpacingToken
  blurs: BlurToken
  sizes: SizeToken
  animations: AnimationToken
  colors: ColorToken
  spacing: SpacingToken
  radii: RadiusToken
  opacity: OpacityToken
  fontSizes: FontSizeToken
  fontWeights: FontWeightToken
  lineHeights: LineHeightToken
  fonts: FontToken
  shadows: ShadowToken
  breakpoints: BreakpointToken
  animationName: AnimationName
} & { [token: string]: never }

export type TokenCategory = "aspectRatios" | "zIndex" | "opacity" | "colors" | "fonts" | "fontSizes" | "fontWeights" | "lineHeights" | "letterSpacings" | "sizes" | "shadows" | "spacing" | "radii" | "borders" | "borderWidths" | "durations" | "easings" | "animations" | "blurs" | "gradients" | "breakpoints" | "assets"
위와 같이 정의한 디자인 토큰 Key와 Value 타입이 제대로 생성이 되었는지를 확인할 수 있습니다.
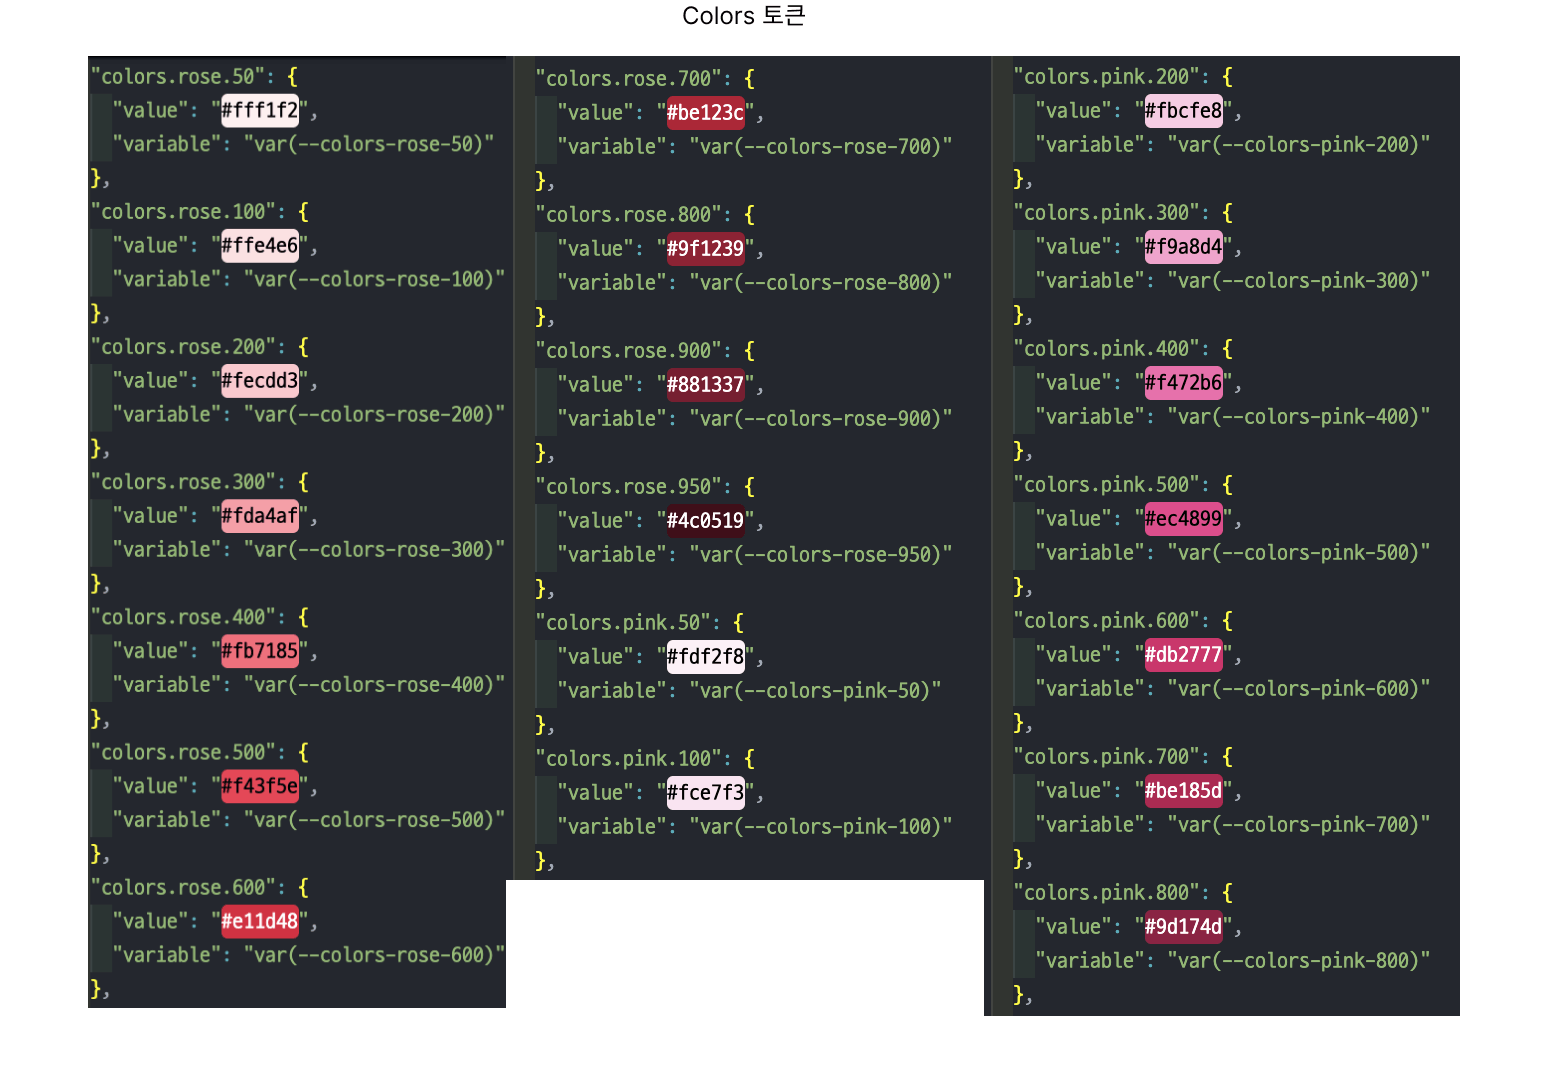
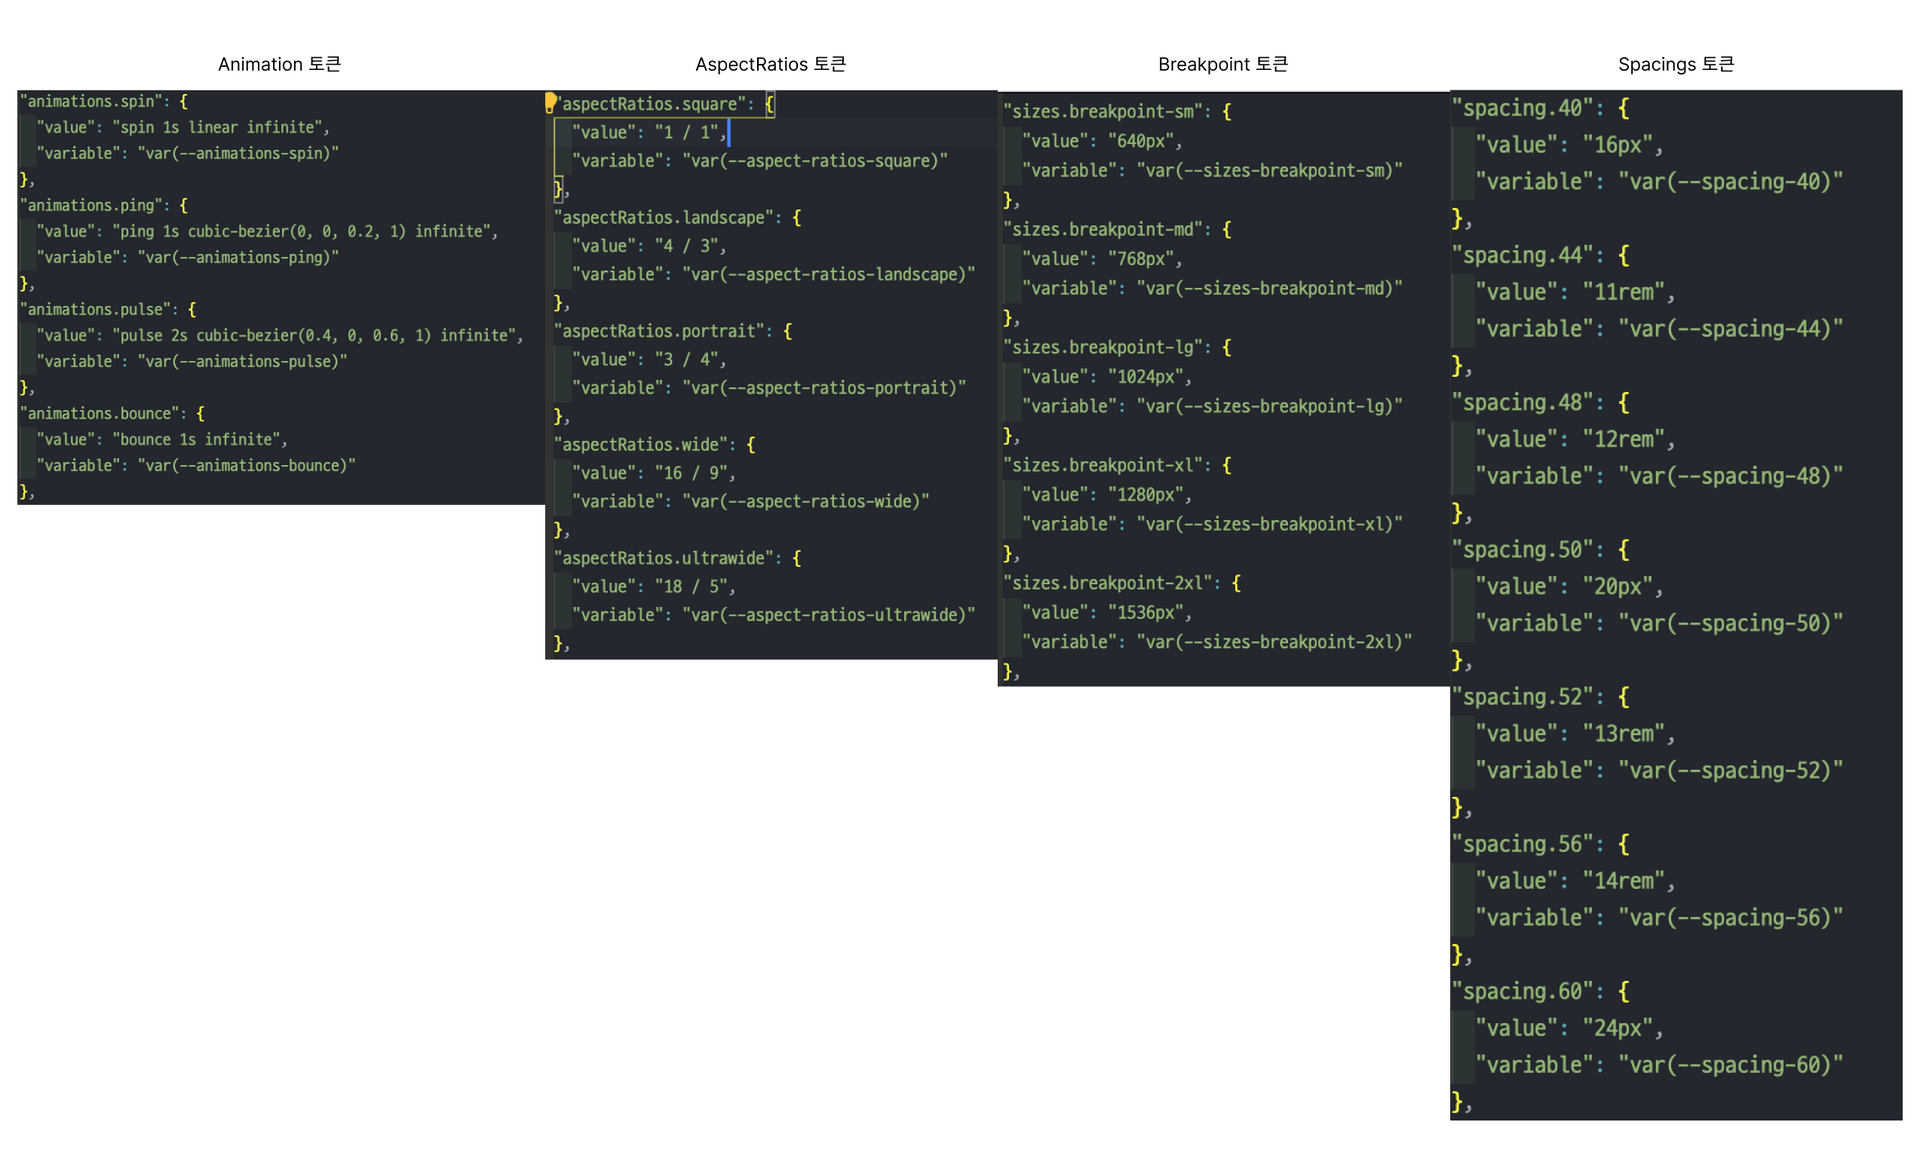
실제 사용할 디자인 토큰은 일부분이지만 어떻게 변환되었는지 볼까요?
위와 같이 이쁘게 토큰화가 되었습니다. 이쁘죠잉?🦊
마무리
개인적으로 해당 프로세스를 설계하고 실무에 사용하면서 느낀 점을 조금 남겨보자면
미비한 타입 정의 (타입스크립트)
타입 정의를 명확하게 하여 보는 분들로 하여금 어색하거나 애매한 부분이 없도록 구현하고 싶었지만 역시 타입스크립트를 게을리한 죄로 명확한 타입을 정의하지 못하였습니다. 이 부분을 계기로 타입스크립트 핸드북을 참고하긴 했지만 타입 정의에 대한 노력을 끊임없이 해야 할 것 같다고 아니 하겠다고 다짐했습니다.
여러분도 개인적인 프로젝트라도 타입 정의를 게을리 하지 마시고 챌린지 해보기시길 바랍니다.
자동 완성 부재
css({ border: '1px solid token(colors.red.400)' })위에 결과물과 같이 Value가 모두 string 타입으로 구현되어 있고 Panda CSS를 활용해 style을 정의할 때 string으로 구현하다보니 자동완성이 되지 않는 아주 불편한 DX(개발자 경험)를 몸소 느꼈습니다. 내부적으로 해당 토큰을 사용할 때 객체 또는 특정 타입으로 읽어드릴 수 있도록 미들웨어나 기능을 구현해서 사용해보도록 하는 것을 목표로 하여 더 구체적으로 타입 추론과 자동완성이 되도록 리팩토링 해보겠습니다.


